Setup Gitlab bastion with OVH public cloud
· 30 minutes

After multiple days of fighting with the Gitlab runner bastion for deploying it on our OVH public cloud infrastructure at Packitoo, I’m gonna disclose how we did it and how can you replicate it quickly and reduce your CICD monthly cost.
In our case before moving to Gitlab runner bastion we had a ubuntu server who was costing us 138 euros monthly and was used less than 20% of the time. The objective was obviously to cut the cost and be able to scale more easily with the company evolution without using Kubernetes for the moment.
To disclose gitlab runner bastion use “docker+machine” configuration who use docker-machine who has been deprecated by Docker Sep 26, 2021 , but Gitlab as forkt it and maintain it until the end of 2024
This as been said let’s dive inside
Requirements
- A server available to receive any request
- The openstack credential for your OVH public cloud instance
- The admin access of the Gitlab project
- 30 minutes
Let’s build
Get OpenStack credential
We gonna start by getting the openstack credential to be able to create our “master node” or “bastion”.
Go on your OVH public cloud interface, then go to the bottom left bar section, in the “Project Management” and click on “Users & Roles”

Choose your personal profile, click on the three dots on the right and choose “Download OpenStack’s RC file”

Install OpenStack client
I will redirect you on the official guide of the openstack installer process but the idea is simple. Get python3 install and Pip3 on your machine then execute
pip3 install python-openstackclientNow to be able to communicate with your openstack, you gonna setup the credential.
First connection
The openstack RC file previously downloaded will be required now.
To use it you will need to do this (On MacOS and Linux)
source $HOME/Downloads/openrc.shIt gonna ask you the Horizon (OpenStack) account password linked to the RC file. You can also edit directly the openrc.sh
Comment the echo, the read and the existing export OS_PASSWORD
# With Keystone you pass the keystone password.
#echo "Please enter your OpenStack Password: "
#read -sr OS_PASSWORD_INPUT
#export OS_PASSWORD=$OS_PASSWORD_INPUT
export OS_PASSWORD="XXXXXXXXXXXX"
Now your “connected” but you still need some more setup to target the exact datacenter you want.
export OS_DOMAIN_NAME=$OS_PROJECT_DOMAIN_NAME
export OS_REGION_NAME=SBG5
The SBG5 is Strasbourg data center 5 but you can take the one you want ex: GRA7, etc…
Now we gonna create our SSH Key, replace [USER] by what you want
openstack keypair create --public-key ~/.ssh/id_rsa.pub [USER]_SSHKEYLet’s get the server list
openstack server listWe have an empty server list here, that normal if you have nothing in the target DC but if you have instances in this server maybe something broke during the process.
Create bastion server
openstack server create --key-name SSHKEY_BASTION --flavor d2-2 --image "Ubuntu 23.04" --network Ext-Net DemoBastionre-do
openstack server listTo get the new server IP to initiate the SSH connection
ssh ubuntu@[NEW_SERVER_IP]If everything goes well your in and you have your new bastion server, now let’s setup Gitlab-runner bastion.
Setup gitlab-runner
Do a quick server update
sudo apt update && sudo apt upgrade -yTo work with OVH horizon we will need to install openstack client here too so let’s do it
sudo apt install python3-pip -y
pip3 install python-openstackclient python-novaclient python-swiftclient
if you have an error you can force the user package
pip3 install python-openstackclient python-novaclient python-swiftclient --break-system-packages
export PATH="$HOME/.local/bin:$PATH" >> .bashrc
Let’s install docker-machine now
curl -L https://gitlab-docker-machine-downloads.s3.amazonaws.com/main/docker-machine-`uname -s`-`uname -m` >/tmp/docker-machine && sudo install /tmp/docker-machine /usr/local/bin/docker-machineCheck if the software is correctly installed
docker-machine versionLet’s install the gitlab-runner now
cd /tmp
curl -L https://packages.gitlab.com/install/repositories/runner/gitlab-runner/script.deb.sh | sudo bash
sudo apt install gitlab-runner
cd $HOME

sudo gitlab-runner start
sudo gitlab-runner register
Concerning the registering procedure
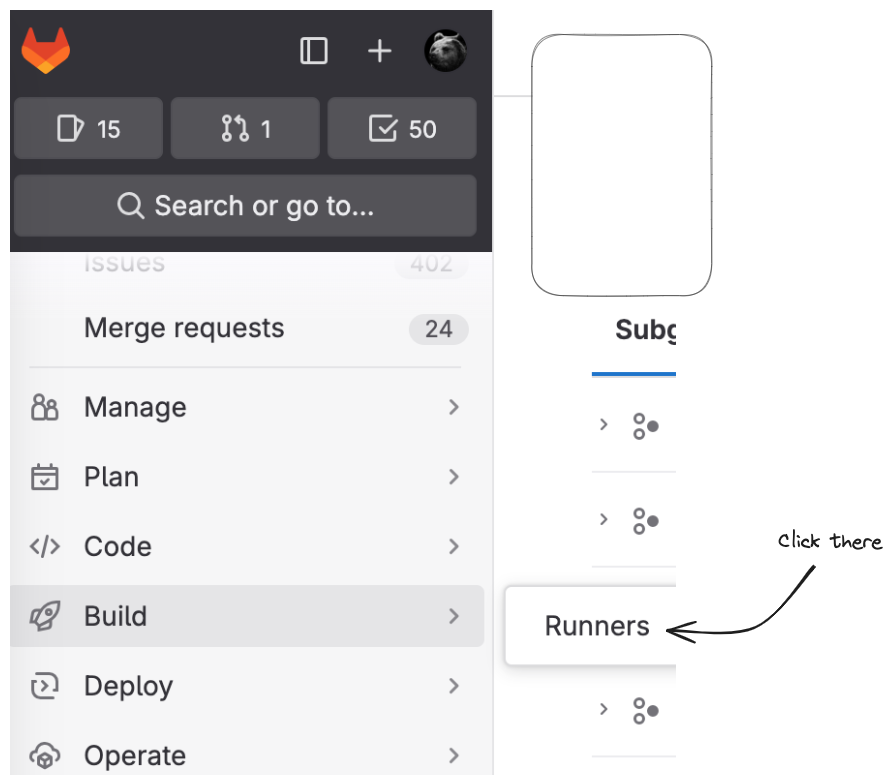
Gitlab UI
To start you must have the OWNER access to the Gitlab groups or project to create a runner.

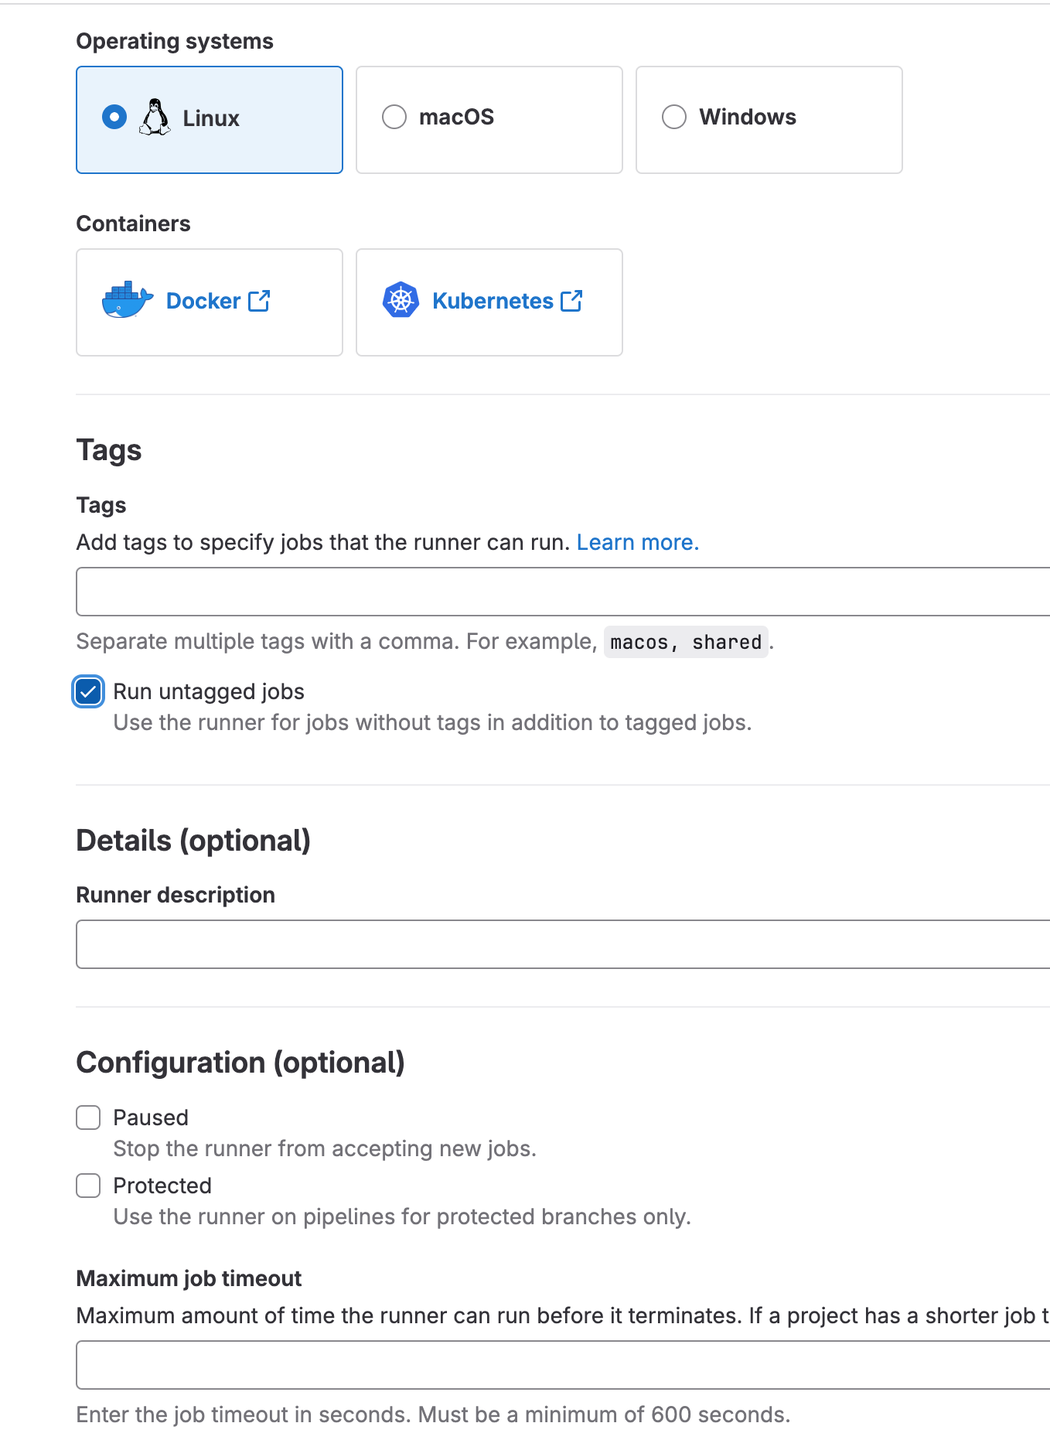
Then

Fill the required fields

You can now validate, It will give you some instruction, but the most importante one is the CLI command given, it should look like that
gitlab-runner register --url https://gitlab.com --token XXXXXXServer
sudo gitlab-runner register  --url https://gitlab.com  --token XXXXXX
Runtime platform                                    arch=amd64 os=linux pid=XX revision=XX version=16.6.1
Running in system-mode.

Enter the GitLab instance URL (for example, https://gitlab.com/):
[https://gitlab.com]:https://gitlab.com
Verifying runner... is valid                        runner=XXX
Enter a name for the runner. This is stored only in the local config.toml file:
[XXXX]: [WHAT YOU WANT]
Enter an executor: custom, docker, docker-windows, parallels, shell, ssh, docker-autoscaler, virtualbox, docker+machine, instance, kubernetes:
docker+machine <-- must be that
Enter the default Docker image (for example, ruby:2.7):
alpine:latest <-- as you want but it common to put alpine
Runner registered successfully. Feel free to start it, but if it's running already the config should be automatically reloaded!

Configuration (with the authentication token) was saved in "/etc/gitlab-runner/config.toml"
So now our gitlab-runner is created, let’s configured it.
Config
I’m gonna give you my template but you can customise it as you want of course.
concurrent = 8

[session_server]
session_timeout = 1800

[[runners]]
limit = 8

name = "[YOUR_BATION_RUNNER_NAME]"

token_expires_at = 0001-01-01T00:00:00Z
url = "https://gitlab.com/"
id = XXXXX <--- your id
token = "XXXXXX" <--- your token
token_obtained_at = 0001-01-01T00:00:00Z <--- your date
executor = "docker+machine"

[runners.docker]
tls_verify = false
image = "alpine:latest"
privileged = false
volumes = ["/var/run/docker.sock:/var/run/docker.sock"]
shm_size = 0
[runners.machine]
IdleCount = 0
IdleTime = 3600
MachineDriver = "openstack"
MachineName = "gitlab-runner-%s"
MaxBuilds = 32
MachineOptions = [
    "openstack-flavor-name=d2-8", <-- Type of instance
    "openstack-image-name=Ubuntu 23.04", <-- Operating system for the boot
    "openstack-net-name=Ext-Net", <-- Network
    "openstack-ssh-user=ubuntu", <-- Ssh user
    "openstack-sec-groups=default",
    "openstack-auth-url=https://auth.cloud.ovh.net/v3", <-- OS_AUTH_URL
    "openstack-tenant-id=XXXX", <-- OS_TENANT_ID
    "openstack-username=user-XXXX", <-- OS_USERNAME
    "openstack-password=XXXXX", <-- OS_PASSWORD
    "openstack-active-timeout=600",
    "openstack-region=SBG5", <-- Datacenter name
    "openstack-domain-name=Default", <-- OS_DOMAIN_NAME
]
[runners.debug]
level = "debug"
[[runners.machine.autoscaling]]
Periods = ["* * * * * sat,sun *", "* * 0-8,21-23 * * mon-fri *"]
IdleCount = 0
IdleTime = 1800
Timezone = "Europe/Paris"
For the OS_X value you can easily have them from your openrc config but I highly recommend to create a specific account to manage this instances for security purpose.
Now we can start the runner
sudo gitlab-runner restart
sudo gitlab-runner start

sudo gitlab-runner run
#alternative, if you want to see what's going on
sudo gitlab-runner --debug run
After the worker start tou can close the ssh connection it will work by himself smoothly.